
Ultimate Guide to Bee Removal
Ultimate Guide to Bee Removal
Bees in Your Home

This is a step-by-step approach to removing bees. With over 20 years of experience in beekeeping and removing bees, we have put together this guide to safely remove bees. After seeing countless failed attempts and poor removals done by pest control companies and amateur beekeepers, this guide is not only educational but the authoritative correct way for live bee removal.
Typically, bees prefer areas such as soffits or roofline eaves to build a hive. Scout bees from a recent honey bee swarm will investigate the area and relay the information back to the swarm. Once the swarm has decided to move, thousands of bees take flight in a cloud of honeybees to their new location. Sometimes the queen, due to age or inability to fly long distances, will take a rest on a nearby tree in the form of a swarm. If this is the case, please review our section on swarm removal.
Equipment
Now that you have found the areas affected by bees, you will need the proper equipment to remove them:
It is best practice to remove bees in the early spring when possible, before the flower bloom or nectar flow, as this will be best for the bees and result in significantly less sticky mess from honey. Ideal temperature for bee removal is between 60–80°F, as bees are sensitive to temperature, especially brood.
Finding the Hive Location
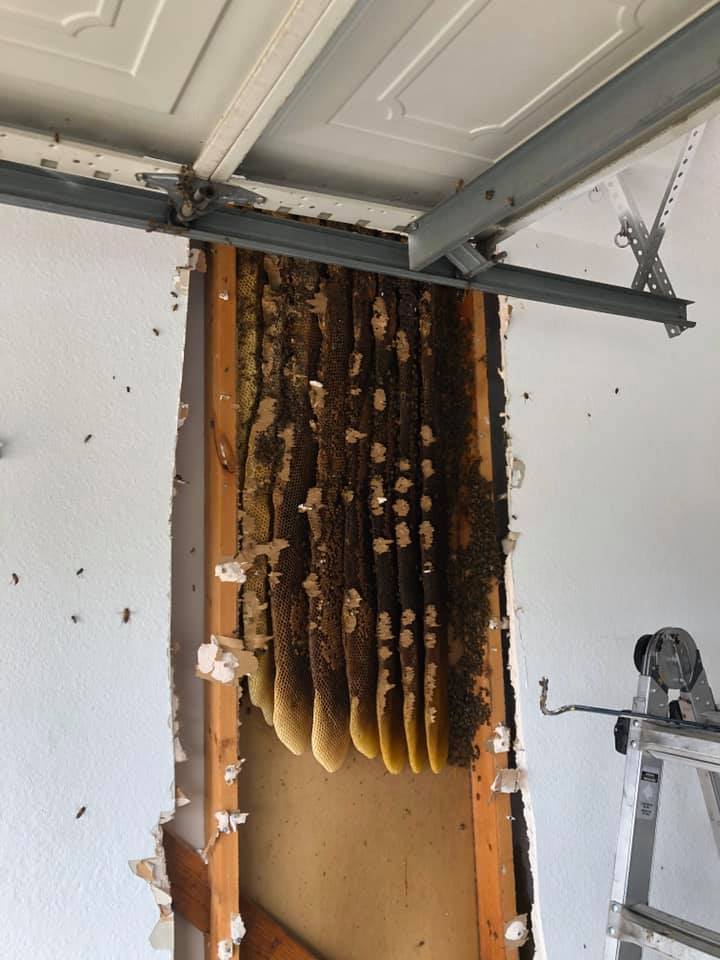
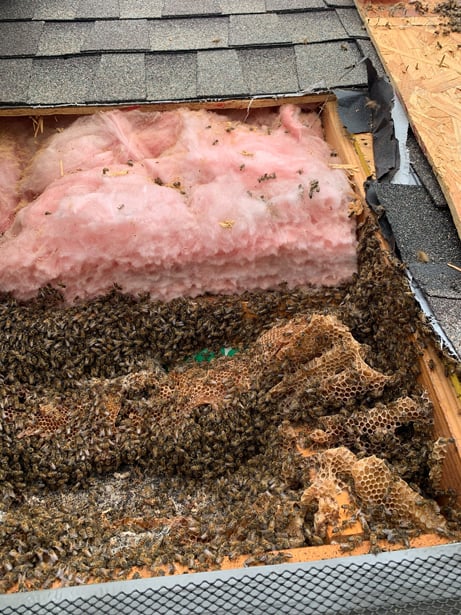
To safely remove bees, you must first find the hive location. Bees tend to build within structures such as soffits or eaves of homes — especially older houses in the south — because of the lack of physical barriers within the structures such as insulation and poor building materials used to construct homes. Bees will also capitalize on compromised housing structure due to weather or animal damage, allowing them access to the area.
Visible signs of bees coming and going from a location, or running a "bee line," is a clear sign of honey bee infestation. Carpenter bees and wasps are significantly fewer in number and often solitary. A specialized thermal camera is recommended when viewing a bee hive, as it will provide a clear picture of the size of the hive and the relative location within the structure.
Once you have identified the location and size of the beehive, make sure you have the proper equipment to safely move the honeybees. This may include adding trash bags or buckets to dispose of the comb, or frames if you want to save the comb when removing (not recommended due to the numerous diseases of honey bees).
Honeybee Removal Process
When removing honey bees, the best time is at dusk and dawn — most of the bees will be inside their hive. If you have aggressive, hot, or Africanized bees, it is best to remove during the day, as most of the bees will be gone pollinating flowers and gathering nectar.
Before you start, smoke the bees — preferably the day before removal, and then again right before you begin the work.
Opening the Structure
Have a plan for how to remove the material from the area with the bees. We recommend going through the roofline, as it does the least amount of visual damage to the area — but you run the risk of a leaking roof if you do not reassemble the area correctly. Some beekeepers recommend cutting the soffit or eave of a house to remove bees. Make sure the cuts are professional and repairable — cut on the seams so they are easily repairable with minimal damage or unsightly scarring.
Do not cut directly under the hive. Cut around it. The piece you remove to access the hive should ideally be one piece with minimal cutting and easily repairable.
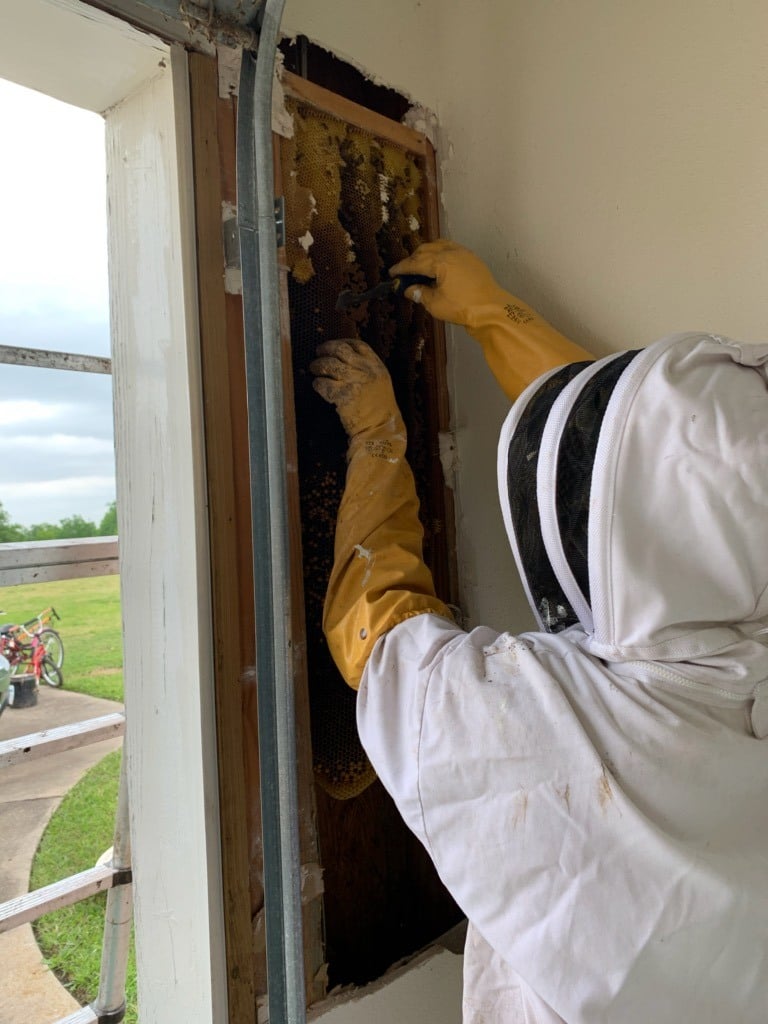
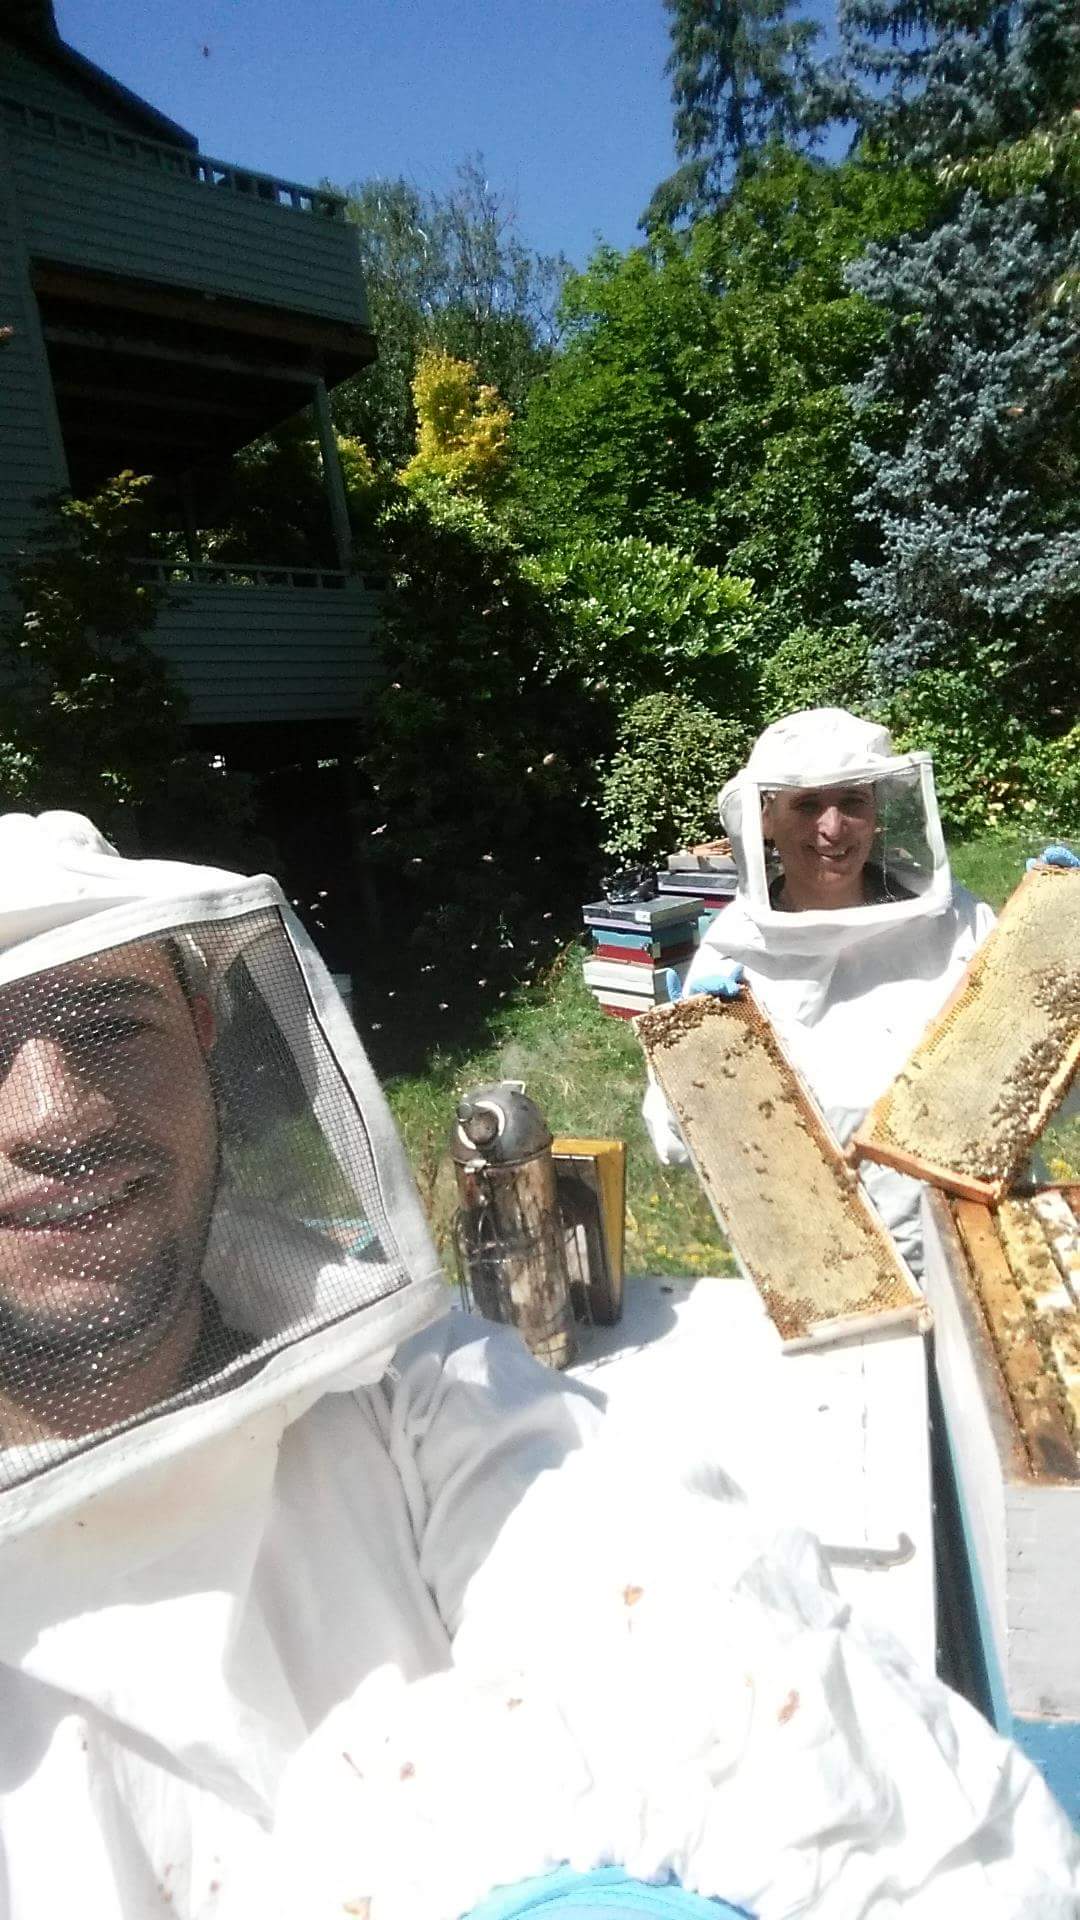
Removing the Bees

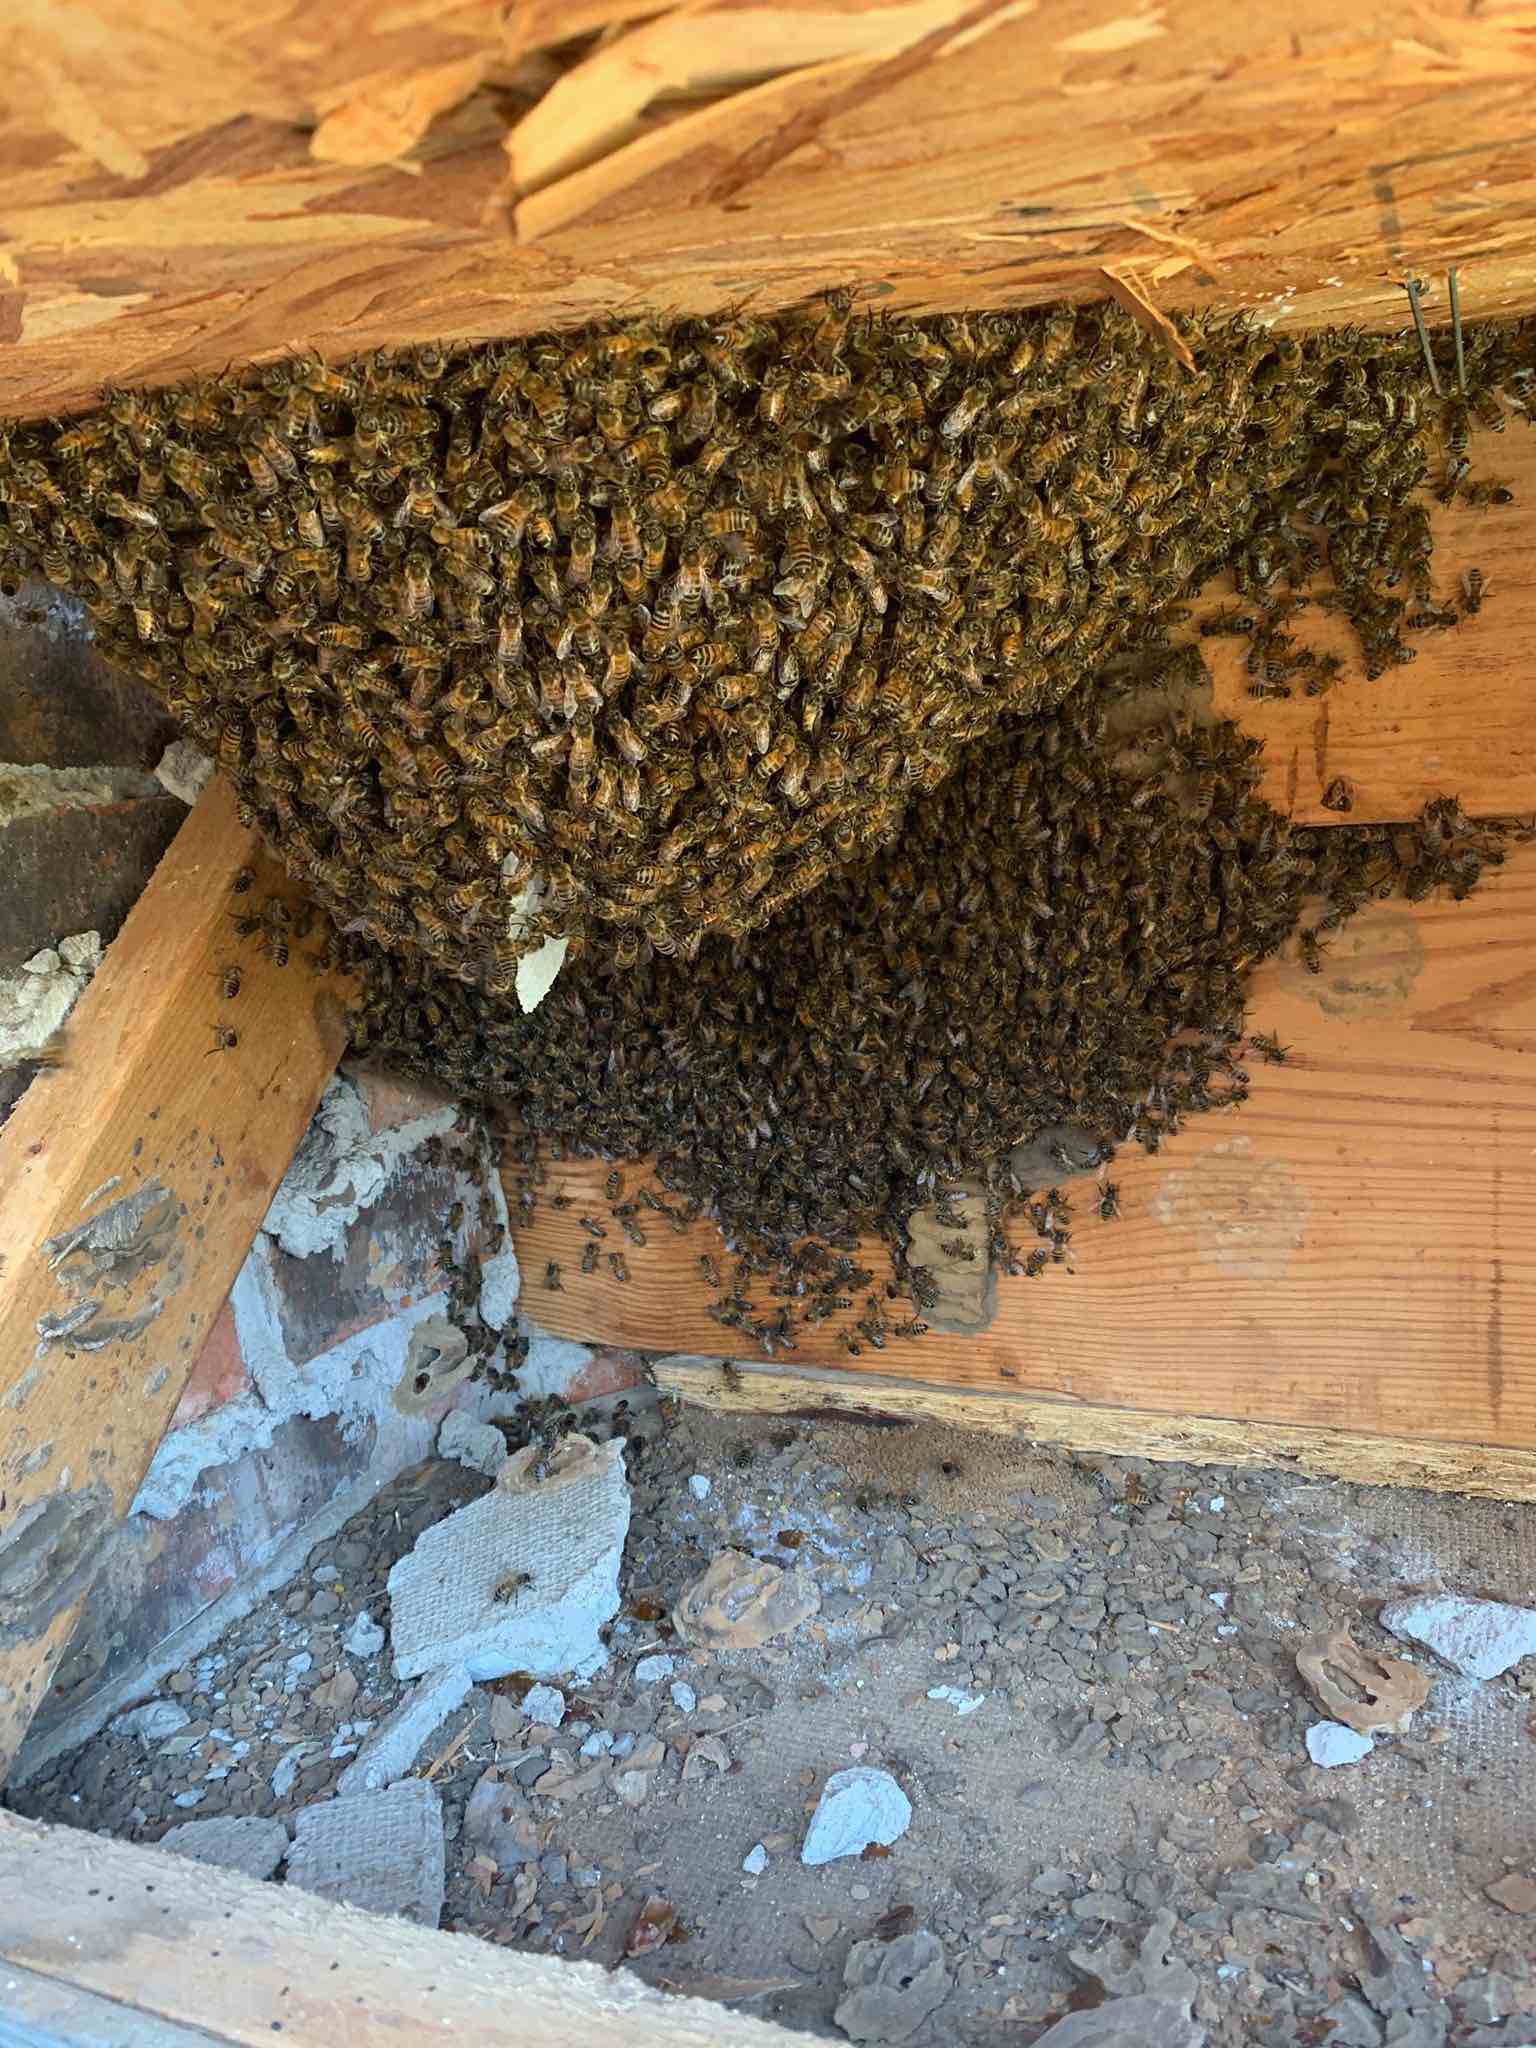
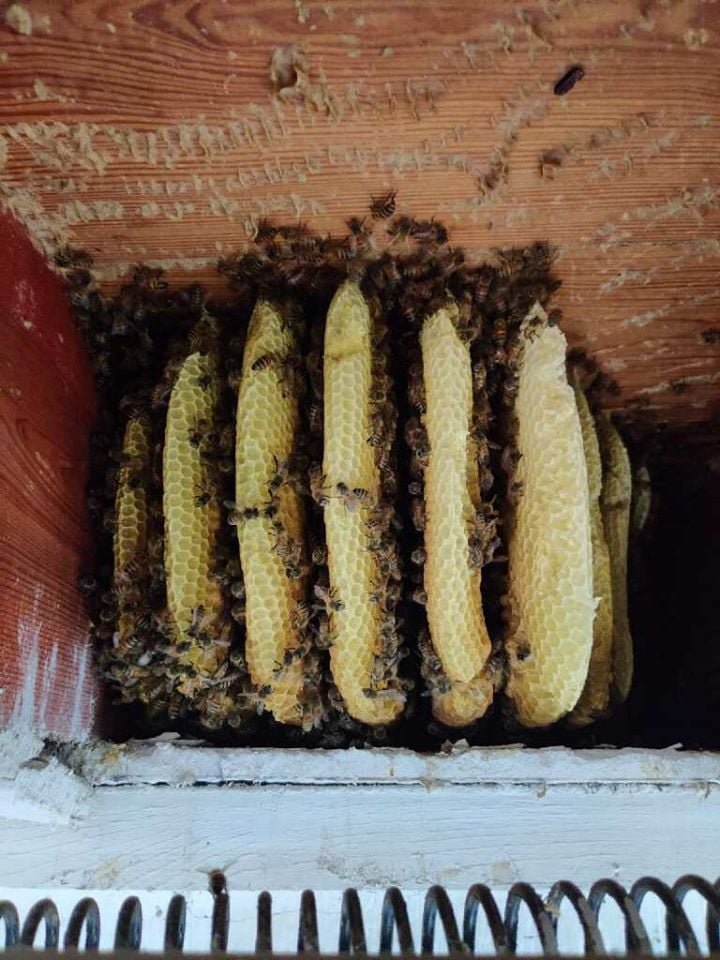
Once you have opened the area, start to remove comb on the outside (one side), farthest back area of the hive, forcing the bees forward and clustering them near the entrance. Scrape the comb with the paint scraper at the top of the comb, careful not to break uncapped honey cells or capped honey.
You can remove brood comb by following under the capped or uncapped honey line, which will be mostly at the top. If you choose to save brood comb, inspect for small hive beetles, wax moths, or other pests. Dispose of unwanted comb after brushing off bees. Separate honeycomb from brood comb — new comb from older, darker comb. New comb will be lighter and much more delicate. This clean comb is highly useable and is the best comb to save.
As you remove comb, work the bees into a pile at the front of the hive entrance. Bees will fan their abdomen when disturbed, signaling for other bees to gather. If you strategically move bees or prevent this behavior in unwanted areas, bees will cluster in ideal spots.
Keep an eye out for the queen. If you capture the queen, immediately put her in a queen clip between your hive frames and place the hive box by the entrance. The bees will gather around her in your hive box.
Cleaning the Cavity
Once the comb is removed, you should have an empty cavity with a pile of bees. If the cluster is at the back of the cavity, you may vacuum or use chemicals such as Bee Go or Bee Be Gone to move bees forward. Remember — if you are using chemicals and it is not your property, a Certified Applicator license may be needed in your state. Some states even require permits to remove bees.
Vacuuming bees should be limited. If bees can be swept using a bee brush, it is best to do this. Bees should be immediately transferred from the vacuum to the hive box. Do not leave bees in the vacuum unattended or in the heat.
Scrape out all remaining beeswax from the hive cavity. You can treat the area with vinegar, dust such as Tempo 1%, boric acid, or powdered insecticides. Painting the inside of the area is ideal, as this will cover the smell of the beehive and prevent future infestations. If possible, fill the area with expanding foam or insulation to prevent the hive from coming back.
The Queen Bee
If you caught the queen, you are in for a treat. By this time, your bees should be clustered on the hive you placed by the original entrance. Gently close them in the box and move them.
Now it is time to put everything back together. Bricks should be mortared back in place. Soffits sealed with expanding foam and/or caulk, and all evidence of the removal removed. Your bees must be relocated more than three miles from the original hive location to prevent them from returning.
Set your hive with drawn comb and a feeder in a good location — two feet off the ground, facing east, with good sun. You can feed back extracted honey or use in-hive feeders with 1:1 white sugar water by weight (or 2/3 sugar to 1/3 water by visual inspection). Do not boil water when adding sugar, as burnt sugar can be harmful for bees — heat water just until the sugar dissolves.
In a few days, check your bees. They should be soundly attached to the frames doing their bee dance. Look for the queen and add a queen if necessary. If you cannot find the queen, look for signs of newly laid eggs in the bottom of each cell.
Bee Proofing & Prevention
We also offer bee proofing and preventative services. Bee proofing your home or business will prevent future bee squatters, and you and your neighborhood bees can live in harmony. We seal up holes, check woodpiles, brush, and other places bees might use to build a hive in your home as a preventative measure to avoid the bee removal process in the future.
Scout bees don't like it when we seal up cracks and crevices. Our preventative services also serve as a deterrent to yellow jacket wasps and hornets. Ask our technicians about this service.
Our locally owned and operated company has a commitment to our customers: "Treat everything like it was your house" and "Always do the right thing."
Think of us next time you search for "bee removal near me" — if you have questions, email or call. We are always here for our customers.
Related Services


Bee Removal Process
Learn about our professional bee removal process and what to expect.
Bee Removal Process →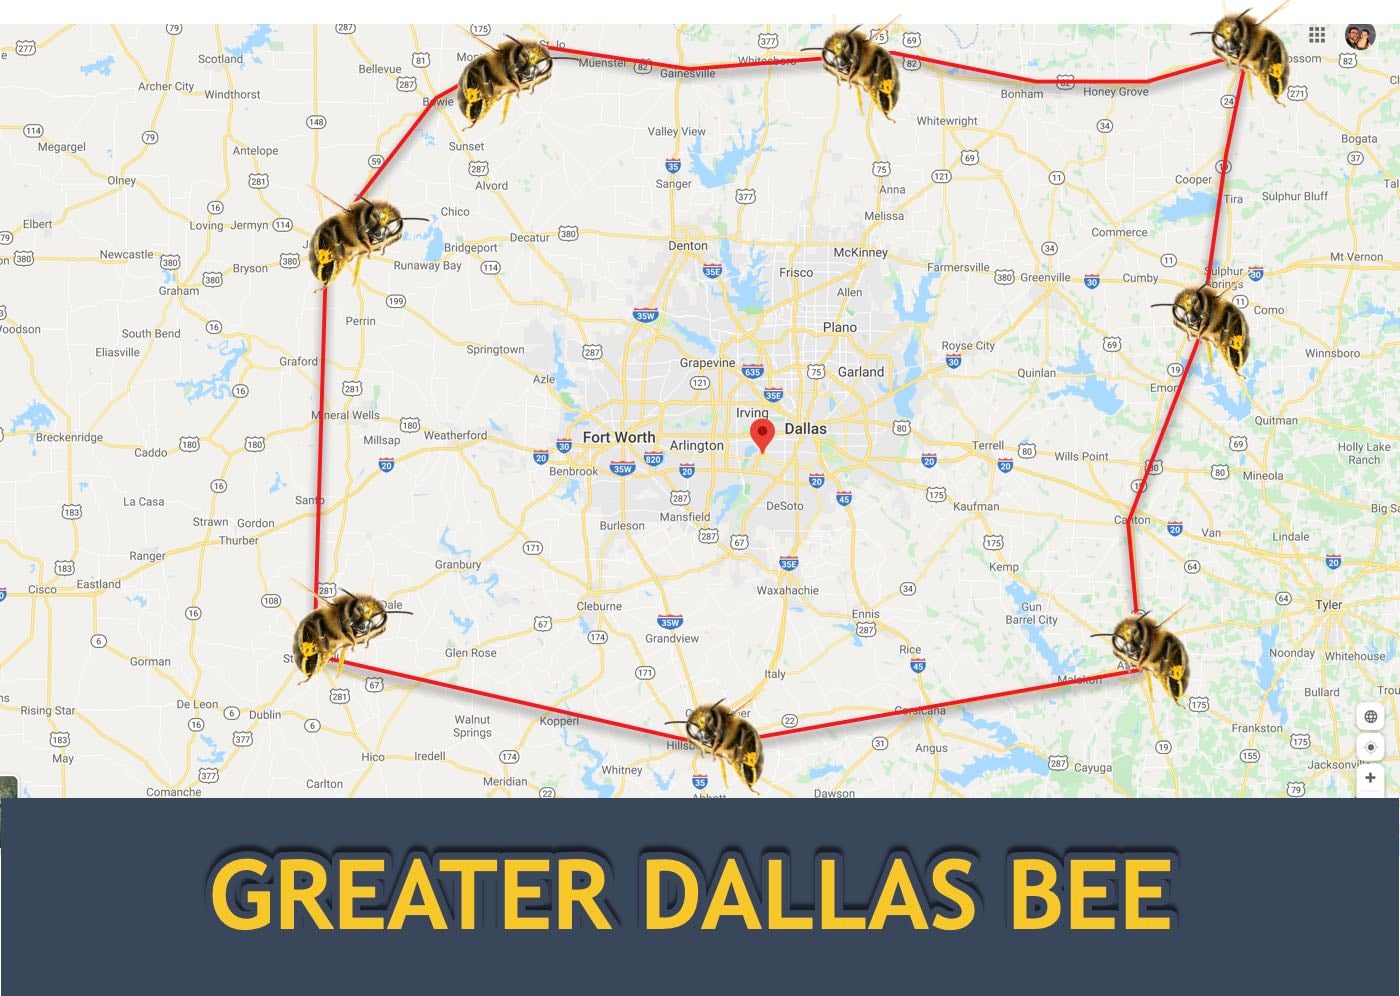
Bee Removal Service Area
Overview of our bee removal service areas across the DFW metroplex.
Bee Removal Service Area →
Bee Removal and Rescue Methods
Learn why bees infest homes and how proper removal prevents them from returning.
Bee Removal and Rescue Methods →Need Help with Ultimate Guide to Bee Removal?
Our expert team is ready to help. Get in touch today for a free consultation and estimate.